Ceiling draping can completely transform event spaces, making them visually stunning and functional. Whether you’re planning a wedding, corporate event, or party, this guide covers everything you need to know about ceiling draping, including styles, materials, costs, and installation tips. Here’s a quick overview:
- What It Is: Ceiling draping involves hanging fabric from ceilings to enhance aesthetics, hide imperfections, and create themed atmospheres.
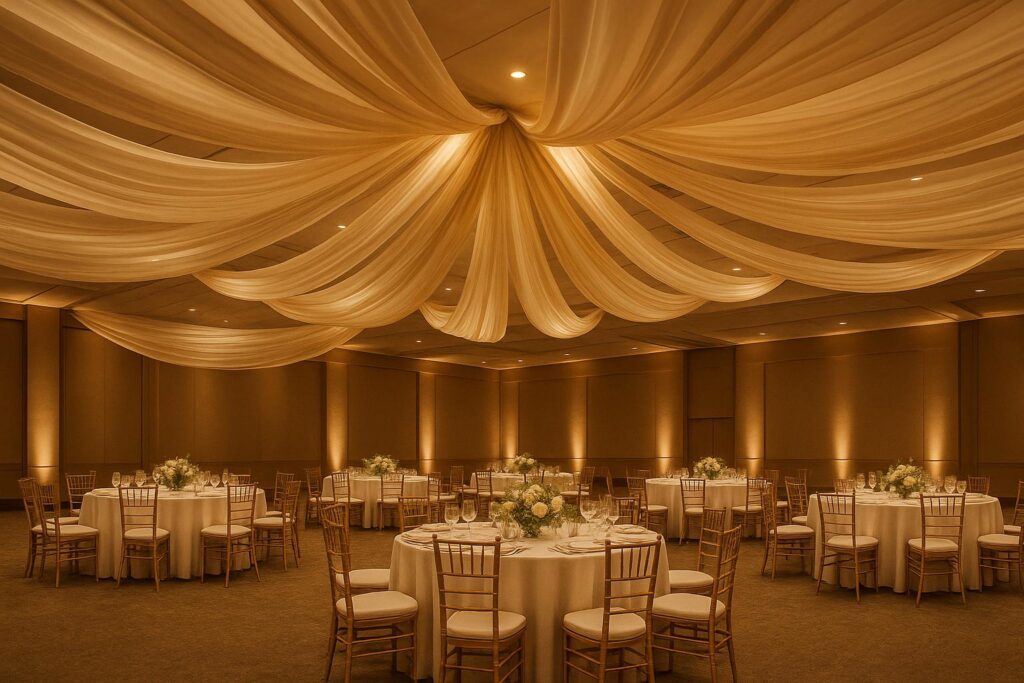
- Popular Styles: Swagging for soft curves, pleating for a structured look, and radial draping for dramatic effects.
- Costs: In Australia, professional services range from AUD $20–$50 per metre, depending on fabric and design complexity.
- Materials: Sheer fabrics like voile and organza are lightweight and elegant, while flame-retardant options meet safety standards.
- Installation: Requires careful planning, precise measurements, and safety checks, especially for high ceilings or heritage venues.
For a polished finish, consider hiring professionals like One Click Events, who handle design, installation, and post-event removal. DIY options are feasible for smaller events but require attention to detail and safety. Ready to create an unforgettable event? Let’s dive in.
How to Create a Ceiling Drape Design
Planning and Designing Your Ceiling Draping
Creating stunning ceiling draping begins with careful planning and thoughtful design. Laying down these essentials ahead of time helps you avoid unnecessary expenses and ensures your event looks polished and well-executed.
Checking Your Venue and Getting Permissions
Before diving into fabric choices or hiring installation services, take a close look at your venue. Pay attention to the ceiling height, structural layout, and load-bearing capabilities. Venues with exposed beams make installations simpler, while drop ceilings may require attaching to grids or beams. If the ceiling is finished, you might need to drill anchor points for proper support.
Be sure to check with the venue about restrictions and secure written permission for any ceiling modifications. Many Australian venues have specific rules for ceiling installations, including the use of fire-retardant fabrics to meet local fire safety regulations. You may also need a compliance certificate for the materials and should be aware of limits on hardware weight or types of attachments allowed.
Reach out to your venue coordinator at least 4–6 weeks before your event. This gives you ample time to handle approvals and adjust your design if needed. Sorting these details early will make the installation process much smoother.
Picking Draping Styles and Themes
The draping style you choose should align with the mood and purpose of your event. For instance:
- Swagging: Creates soft, flowing curves, perfect for romantic or formal occasions like weddings.
- Pleating: Offers a clean, structured look ideal for corporate events or modern themes.
- Horizontal Draping: Uses long fabric panels to create dramatic backdrops, often suited for large-scale events or photo zones.
Before finalising your fabric choice, test samples under the venue’s lighting. Colours can shift dramatically depending on the lighting conditions. A fabric that looks perfect in daylight might appear completely different under evening or artificial lighting. Also, think about how uplighting or spotlights might enhance the fabric’s appearance, adding depth or creating interesting shadows. These choices should complement the venue’s features while bringing your event vision to life.
Measuring and Budgeting for Draping
Accurate measurements are the backbone of a successful draping project. Use a tape measure to record the ceiling’s length and width in metres. If your design includes a central hoop or ring, measure from the centre to each attachment point. For horizontal draping, calculate the total length of fabric panels required.
In Australia, professional ceiling draping services typically cost between AUD $20 and $50 per metre. Costs depend on factors like fabric type, design complexity, and ceiling height. When planning your budget, remember to include both material and labour expenses. Sheer fabrics are generally more affordable, while heavier options like velvet or satin can be pricier.
| Draping Style | Best For | Visual Effect | Complexity | Cost (AUD/metre) |
|---|---|---|---|---|
| Swagging | Weddings, galas | Soft, romantic | Medium | 20–40 |
| Pleating | Corporate, formal | Structured, elegant | High | 30–50 |
| Valance | Framing, accents | Decorative, defined | Low | 20–30 |
For smaller, DIY events, costs might range between $200 and $500. Larger events with professional installation could exceed $1,000. Always set aside 10%–15% of your budget for unexpected expenses, such as extra hardware or last-minute design tweaks.
To streamline the process, create a detailed layout of your draping plan. Include anchor points and fabric flow patterns in your design map. This visual guide ensures everyone involved understands your vision and makes installation far more efficient.
Once your plans and budget are in place, you can confidently move on to selecting high-quality materials and equipment.
Materials and Equipment for Ceiling Draping
Creating a visually stunning and secure ceiling draping installation starts with selecting the right materials and tools. By focusing on quality and adhering to Australian venue standards, you can achieve a professional finish while ensuring safety.
Choosing the Right Fabrics
Sheer fabrics like voile and organza are widely favoured in Australia for their elegant, flowing appearance and ease of handling. Their translucent quality allows venue lighting to shine through beautifully, creating soft, ambient effects that elevate the atmosphere of any event.
Polyester is another excellent option, known for its durability and wide range of colours and finishes. It’s a cost-effective choice, especially for larger installations, and its wrinkle-resistant properties ensure it looks polished throughout long events.
For venues with strict safety standards, flame-retardant fabrics are essential. Australian fire safety regulations often require certified flame-retardant materials, particularly in heritage buildings or venues with specific compliance needs. Always request certification when sourcing these fabrics to ensure they meet safety guidelines.
If you’re planning an outdoor event, consider Australia’s variable climate. UV-resistant and weatherproof fabrics are ideal for withstanding the intense heat and humidity common in many regions. For indoor settings, think about how the fabric’s colour will look under the venue’s specific lighting, as artificial and natural light can create very different effects.
A good rule of thumb: use 25–30% more fabric than the distance between anchor points to achieve the desired draping effect.
Required Equipment for Installation
To install ceiling draping professionally and securely, you’ll need the right equipment. Pipe and drape systems are a staple, offering a stable and adjustable framework to support the fabric’s weight and tension.
Central anchor points, such as rings or hoops, are crucial for creating balanced drape designs. These must be rated to handle the combined weight of the fabric and any additional decorations. For smaller spaces, rods work well, while tension wires are better suited for spanning larger areas. Durable clamps and fasteners are indispensable, especially when working in heritage venues with structural limitations.
Safety should always be a priority. Use ladders or scaffolding that comply with Australian safety standards, and ensure your team is trained in safe installation practices. Before starting, check for potential hazards like electrical wiring or sprinkler systems to avoid accidents.
| Equipment Type | Best Application | Key Benefits | Safety Considerations |
|---|---|---|---|
| Pipe and Drape Systems | Large venues, professional events | Adjustable height, stable support | Requires proper anchoring |
| Tension Wires | Expansive spaces | Spans long distances | Needs technical expertise |
| Central Ring Systems | Medium-sized venues | Balanced load, easy setup | Verify ceiling load capacity |
When attaching draping to surfaces, ensure the structure can safely support the weight. This is especially important in older or heritage buildings where structural integrity might vary.
Eco-Friendly Material Choices
Sustainability is becoming a key focus in Australia’s event industry, and there are plenty of eco-conscious options for ceiling draping. Organic cotton, recycled polyester, and bamboo-based fabrics are excellent alternatives that reduce environmental impact while maintaining visual appeal. These materials are either biodegradable or made from recycled content, making them a greener choice.
Reusable draping systems are another smart option, particularly for event companies or frequent hosts. Modular pipe and drape kits can be reused across multiple events, cutting down on waste while still delivering professional results. This approach is especially beneficial for corporate clients who host events regularly.
Opting for locally sourced fabrics not only reduces your carbon footprint but also supports Australian manufacturers. Many suppliers now offer eco-friendly packages that include sustainable fabrics and reusable hardware, making it easier to align with environmentally conscious practices.
For event hire businesses, investing in sustainable materials can set you apart in the market. These choices appeal to clients who prioritise environmental responsibility and align with the growing trend of corporate sustainability initiatives in Australia.
With the right materials and equipment in hand, you’re ready to move forward with the installation process, ensuring your draping project is both stunning and secure.
sbb-itb-9167268
Step-by-Step Guide to Installing Ceiling Draping
Installing ceiling draping takes careful planning, precise execution, and a strong focus on safety. By following a structured approach, you can achieve a professional look while meeting Australian safety standards.
Preparation and Marking Anchor Points
Start by inspecting the ceiling structure to identify load-bearing areas and potential risks. Whether you’re working with open beams, drop ceilings, or finished surfaces, understanding the structure’s limitations is crucial. Assess accessibility and flag any hazards that might complicate the process.
Measurements are key. Use a tape measure to determine the distances from the central point to each attachment location around the perimeter. Plan for a fabric surplus of 25–30%. For example, if you’re covering a 10-metre span, you’ll need 12.5–13 metres of fabric. This extra material ensures the draping looks elegant without appearing too slack.
Mark the anchor points using temporary markers and refer to a detailed layout plan to avoid errors. Double-check measurements to ensure symmetry – uneven spacing will stand out once the fabric is installed. If you’re working with a drop ceiling, identify grid points that can bear the weight, as these will serve as your attachment locations.
Once the anchor points are marked, install the central fixtures to evenly distribute the weight.
Installation Methods and Best Practices
The order of installation plays a big role in both safety and the final look. Begin by securing the central ring or hoop, which acts as the main anchor point, before moving on to the perimeter attachments. This step ensures a stable structure and allows you to test the weight distribution early.
For smaller spaces, rods are a simple and direct solution. In larger venues, tension wire systems are a better choice, as they can cover wide areas without requiring long rigid supports. For drop ceilings, hinged ceiling hooks or grid hooks are ideal since they attach securely without altering the structure.
To maintain balance, alternate attachment points (e.g., north, south, east, and west) rather than working sequentially around the perimeter. This technique prevents uneven stress on any single point and keeps tension balanced.
| Installation Method | Best Application | Key Advantage | Primary Consideration |
|---|---|---|---|
| Rod Systems | Small spaces under 6 metres | Simple setup, direct support | May need custom lengths for larger areas |
| Tension Wires | Large venues over 10 metres | Flexible spanning capability | Requires proper tensioning skills |
| Drop Ceiling Hooks | Suspended ceiling venues | No structural changes needed | Limited to grid spacing |
Before finalising the installation, check that the fabric length achieves the desired drape. Lightweight, sheer fabrics are often a good choice as they’re easier to handle. Ensure all attachment surfaces can support the combined weight of the fabric and any decorative elements.
Safety Rules During Installation
Safety must always come first. Use ladders or scaffolding that comply with Australian standards, and ensure your team wears the right personal protective equipment. Never exceed the weight limits specified for ceiling fixtures or temporary structures.
It’s also important to use certified flame-retardant fabrics and compliant hardware, especially in commercial venues. Always request certification documentation for materials to ensure they meet Australian regulations. This is particularly important for heritage buildings or venues with strict safety protocols.
Secure the draping with hardware rated for the load. Use safety cables as backup support for heavier installations, and make sure zip ties, clamps, and carabiners meet the manufacturer’s guidelines. Test every attachment point before adding the fabric to confirm it can handle the weight.
Be mindful of venue-specific safety rules, such as keeping emergency exits clear and avoiding interference with fire suppression systems. Check these requirements during your initial site inspection and adjust your design as needed.
For large-scale projects, consider hiring experienced professionals. Companies like One Click Events can provide expert guidance, ensuring your installation meets safety requirements while delivering a polished result.
Maintenance and Post-Event Care
Taking care of your ceiling draping during and after an event is key to maintaining its quality and ensuring it looks polished throughout the occasion.
Keeping Drapes Clean During Events
Assign staff to regularly check the drapes – ideally every hour. If spills occur, blot them gently with a damp microfibre cloth. Avoid rubbing, especially with delicate fabrics like chiffon or organza, as this can damage the material. For more stubborn stains, use a mild detergent suitable for the fabric, but steer clear of harsh chemicals that could cause discolouration or weaken the fibres.
To minimise risks, keep food and drink stations at least 2 metres away from draped areas. You can also use subtle barriers or clear signage to discourage guests from touching or pulling on the fabric. For outdoor events, consider using water-resistant materials to guard against unexpected rain or high humidity.
Make sure all drapes stay securely fastened during the event. Loose or sagging fabric not only detracts from the overall look but also increases the chance of damage from people moving around beneath them.
When the event wraps up, shift your attention to careful removal and storage.
Post-Event Removal and Storage
Start taking down the drapes from the outer edges, working your way to the centre – essentially reversing your installation process. This approach reduces strain on the fabric and helps maintain its condition. Always use proper ladders or scaffolding, and for larger or heavier drapes, enlist a partner to avoid accidental drops.
Remove zip ties or clips carefully – don’t yank them off, as this can tear the fabric. Work methodically to keep the drapes intact. As you take down each section, inspect it for stains, tears, or signs of wear. Tackling these issues immediately makes them easier to fix. Clean the drapes according to their specific care instructions before storing them. While many fabrics can go through a gentle machine wash, delicate or specialty materials may require dry cleaning. Be sure the drapes are completely dry before folding to prevent mould or mildew – this is especially important in Australia’s humid regions.
For storage, follow the fabric’s natural seams or pleats to avoid deep creases. Where possible, roll longer panels instead of folding them. Use acid-free tissue between layers for delicate fabrics, and store them in breathable, labelled bags in a cool, dry place.
After cleaning and inspection, think about sustainable options for any materials that can no longer be used.
Eco-Friendly Disposal Options
Sustainability doesn’t end when the event does. If you have gently used drapes, consider donating them to local community groups, schools, or theatre companies. Many organisations appreciate quality fabric donations for their events or productions.
For drapes that are beyond repair, check with your local council about textile recycling programmes. Some councils in Australia even offer specialised collection services to repurpose old fabrics into industrial rags or new materials.
Get creative with repurposing. In Australia, event planners have turned ceiling drapes into reusable shopping bags, stage backdrops for community events, or insulation for shelters. Larger pieces can also be cut down into table runners, bunting, or other decorative items for future occasions.
If you must dispose of the materials, confirm with your local council about textile recycling options. Many councils now include fabric recycling in their waste management plans, helping to reduce landfill waste and support circular economy initiatives.
Conclusion and Next Steps
Key Points from the Guide
Creating stunning ceiling draping boils down to three main factors: careful planning, high-quality materials, and adhering to safety guidelines. These are the cornerstones of a polished and trouble-free installation.
Start by designing your draping layout and securing any necessary permissions from the venue before handling the fabric. Always plan for extra material to achieve that graceful, flowing look. Opt for lightweight, flame-retardant fabrics like sheer voile, and ensure that your anchor points are sturdy enough to handle the weight safely.
The difference between a DIY attempt and a professional finish often lies in the quality of materials and the skill of the installation. Professionals bring advanced techniques, experience in handling tricky venues, and an unwavering focus on safety. For weddings, corporate events, or venues with unique challenges, hiring experts ensures not only a breathtaking display but also the safety of everyone involved.
How One Click Events Can Help

One Click Events provides a full range of ceiling draping services, from initial design consultation to professional installation and even post-event removal. They also offer complementary services like photo booths, flower walls, lighting, and DJ setups, creating a cohesive and visually stunning event design. By managing multiple elements under one roof, they eliminate the stress of juggling multiple vendors while maintaining consistent quality throughout.
As a multi-award-winning provider, their express service caters to last-minute requests, and their fully insured operations provide peace of mind – especially compared to the risks of DIY attempts. Whether you’re organising a small wedding or a large corporate gathering, their expertise ensures your draping not only looks amazing but also enhances the overall event experience.
Start Your Ceiling Draping Project
Begin by evaluating your ceiling type and taking precise measurements. Sketch a layout that highlights anchor points and fabric runs, then calculate your material and hardware needs. Set a budget that accounts for fabric, equipment, and any professional services you may require.
For smaller, straightforward setups, a DIY approach may be sufficient. However, if you’re aiming for a flawless presentation – or dealing with high ceilings, intricate designs, or strict safety standards – professional installation is the safer and more reliable option.
To discuss your project, visit One Click Events at https://oneclickevents.com.au. Their team can help you explore tailored solutions, whether you need a complete installation or just expert advice for your setup. Early consultations ensure availability and allow ample time for planning. They can also guide you on integrating ceiling draping with other elements like lighting and photography backdrops for a cohesive and striking design.
With the right preparation and professional support, ceiling draping can transform any space into a memorable venue that will leave a lasting impression on your guests.
FAQs
What safety precautions should you take when installing ceiling draping in heritage venues?
When setting up ceiling draping in heritage venues, safety and preservation should always come first. Start by consulting with venue management or a heritage advisor to understand any specific rules or restrictions tied to the property.
Use non-invasive techniques like clamps or tension rods to secure the draping. This prevents any damage to the walls, ceilings, or fixtures. It’s also crucial to choose flame-retardant materials to meet fire safety standards and minimise risks. Bringing in experienced professionals who specialise in heritage spaces can make a huge difference in ensuring all safety and preservation guidelines are followed correctly.
How can I make sure my ceiling draping colours look perfect under different lighting at my event?
When planning your ceiling draping, it’s crucial to test fabric samples under the same lighting conditions you’ll have at the venue. Lighting – whether warm or cool – can dramatically change how colours appear. If you can, bring the fabric to the venue during a lighting test to see how it looks in the actual setting.
You might also want to think about using neutral or complementary lighting to make your draping colours stand out. Soft white or natural lighting tends to preserve the original shades of the fabric. Collaborating with your event planner or lighting technician can ensure you get the perfect effect.
What are some sustainable materials for ceiling draping, and how can they help create an eco-friendly event?
Using environmentally conscious materials for ceiling draping is an excellent way to lower your event’s ecological footprint without compromising on style. Materials such as organic cotton, hemp fabric, or recycled polyester are fantastic choices – they’re sturdy, reusable, and break down naturally over time. By opting for these alternatives, you can cut down on waste while crafting an elegant and eco-conscious event atmosphere.
Another practical approach is renting draping materials from a professional event hire service, like One Click Events. Rental options ensure that the same materials are reused across multiple events, reducing waste even further. Opting for sustainable draping solutions not only showcases care for the planet but also creates a visually stunning experience your guests will appreciate.